


Description
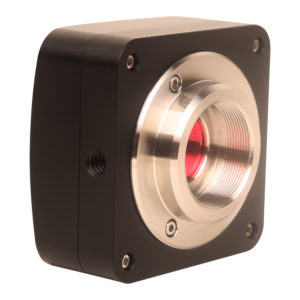
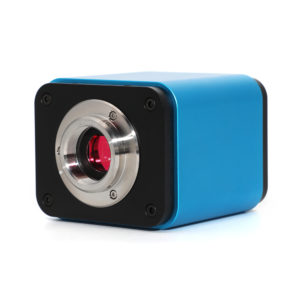
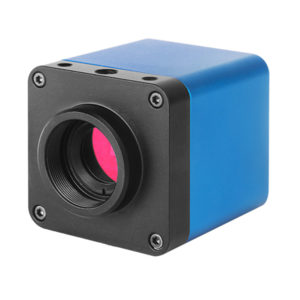
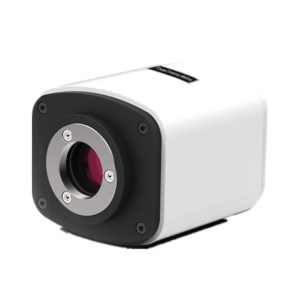
XCAMLITE4K HDMI/USB Multi-outputs 4K SONY Microscope Camera
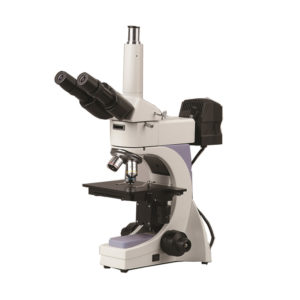
The XCAMLITE4K series microscope camera is designed for high-resolution digital image acquisition from stereo microscopes and biological microscopes. Featuring a Sony Exmor back-illuminated CMOS sensor, this camera delivers outstanding image clarity, accurate color reproduction, and stable performance for industrial inspection, laboratory imaging, and educational applications.
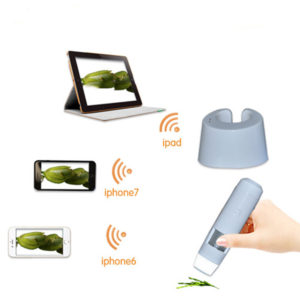
With 4K HDMI and USB multi-output support, the XCAMLITE4K provides flexible connectivity for real-time display and computer-based image capture. The system automatically switches between 4K and 1080P according to the connected display resolution, ensuring optimal viewing quality in different working environments.
An integrated SD card slot allows direct storage of captured images and videos, while the embedded XCamView system enables standalone camera control without a PC. Combined with a powerful built-in ISP (Image Signal Processor) and advanced image processing functions, the XCAMLITE4K series ensures smooth operation, high image fidelity, and reliable performance.
The camera is fully compatible with ToupView / ToupLite software for Windows PC and ToupLite software for macOS, supporting image capture, analysis, and documentation workflows.
XCAMLITE4K Series Camera’s Datasheet(2)
| Order Code | Sensor & Size(mm) | Pixel(μm) | G Sensitivity | FPS/Resolution | Binning | Exposure(ms) |
| XCAMLITE4K8MPA | Sony IMX334(C)
1/1.8″(7.68×4.32) |
2.0×2.0 | 505mv with 1/30s
0.1mv with 1/30s |
30@3840*2160(HDMI)
20@3840*2160(USB) |
1×1 | 0.04~1000 |
| XCAMLITE4K8MPB | Sony IMX485(C) 1/1.2″(11.14×6.26) | 2.9×2.9 | 2188mv with 1/30s 0.39mv with 1/30s | 30@3840*2160(HDMI)
20@3840*2160(USB) |
1×1 | 0.04~1000 |
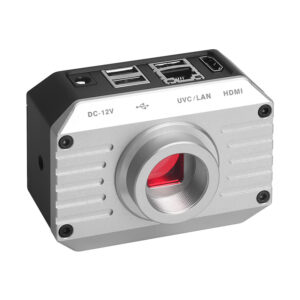
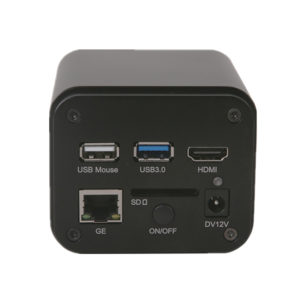
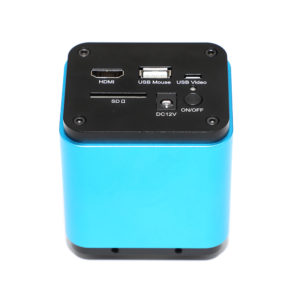
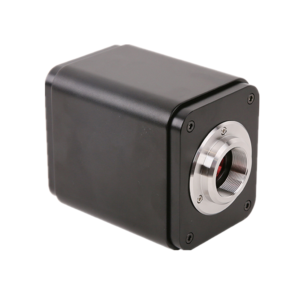
Available Ports on the Back of the Camera Body
Figure 3‑1 Available Ports on the Back Panel of the Camera Body
| Interface | Function Description |
| USB Mouse | Connect USB mouse for easy operation with embedded XCamView software; |
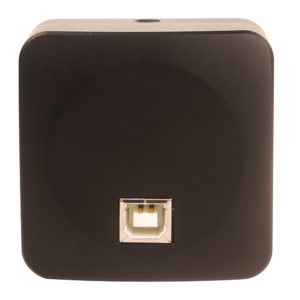
| USB Video | Connect PC or other host device to realize video image transmission; |
| HDMI | Comply with HDMI1.4 standard. 4K or 1080P format video output for standard monitor; |
| DC12V | Power adapter connection (12V/1A); |
| SD | Comply with SDIO3.0 standard and SD card could be inserted for video and images storage; |
| LED | LED status indicator; |
| ON/OFF | Power switch; |
XCAMLITE4K Series Camera Function Description
Video Output
| Video Output Interface | Function Description |
| HDMI Interface | Comply with HDMI1.4 standard;
30fps@4K or 30fps@1080P; |
| USB Video Interface | Connecting USB port of PC for video transfer ;
MJPEG format video; |
Image Capture and Video Saving in SD Card
| Function Name | Function Description |
| Video Saving | Video format:8M(3840*2160) H264/H265 encoded MP4 file;
Video saving frame rate:30fps; |
| Image Capture | 8M (3840*2160) JPEG/TIFF image in SD card ; |
| Measurement Saving | Measurement information saved in layer mode with image content;
Measurement information is saved together with image content in burn in mode. |
ISP Function
| Function Name | Function Description |
| Exposure / Gain | Automatic / Manual Exposure |
| White Balance | Manual / Automatic / ROI Mode |
| Sharpening | Supported |
| 3D Denoise | Supported |
| Saturation Adjustment | Supported |
| Contrast Adjustment | Supported |
| Brightness Adjustment | Supported |
| Gamma Adjustment | Supported |
| 50HZ/60HZ Anti-flicker Function | Supported |
Image Operation Function
| Function Name | Function Description |
| Zoom In/Zoom Out | Up to 10X |
| Mirror/Flip | Supported |
| Freeze | Supported |
| Cross Line | Supported |
| Overlay | Supported |
| Embedded Files Browser | Supported |
| Video Playback | Supported |
| Measurement Function | Supported |
Other Functions
| Function Name | Function Description |
| Embedded RTC(Optional) | To support accurate time on board |
| Restore Factory Settings | Supported |
| Multiple Language Support | English / Simplified Chinese / Traditional Chinese / Korean / Thai / French / German / Japanese / Italian / Russian |
XCAMLITE4K Series Camera Packing Information(TBD)
Figure 5‑1 The XCAMLITE4K Series Camera Packing Information
| Standard Packing List | |||
| A | Gift box : L:25.5cm W:17.0cm H:9.0cm (1pcs,1.43kg/ box) | ||
| B | XCAMLITE4K series camera | ||
| C | Power Adapter: Input: AC 100~240V 50Hz/60Hz, Output: DC 12V 1A
American standard: Model: GS12U12-P1I 12W/12V/1A: UL/CUL/BSMI/CB/FCC EMI Standard:EN55022,EN61204-3, EN61000-3-2,-3, FCC Part 152 class B, BSMI CNS14338 EMS Standard:EN61000-4-2,3,4,5,6,8,11,EN61204-3,Class A Light Industry Standard |
||
| European standard:Model:GS12E12-P1I 12W/12V/1A; TUV(GS)/CB/CE/ROHS
EMI Standard:EN55022,EN61204-3, EN61000-3-2,-3, FCC Part 152 class B, BSMI CNS14338 EMS Standard:EN61000-4-2,3,4,5,6,8,11,EN61204-3,Class A Light Industry Standard |
|||
| D | USB Mouse | ||
| E | HDMI cable | ||
| F | USB2.0 A male to A male gold-plated connectors cable /2.0m | ||
| G | CD (Driver & utilities software, Ø12cm) | ||
| Optional Accessory | |||
| H | SD card(16G or above; Speed: class 10) | ||
| I | Adjustable lens adapter | C-Mount to Dia.23.2mm eyepiece tube (Please choose 1 of them for your microscope) |
108001/AMA037 108002/AMA050 108003/AMA075 |
| J | Fixed lens adapter | C-Mount to Dia.23.2mm eyepiece tube (Please choose 1 of them for your microscope) |
108005/FMA037 108006/FMA050 108007/FMA075 |
| Note: For K and L optional items, please specify your camera type(C-mount, microscope camera or telescope camera), our engineer will help you to determine the right microscope or telescope camera adapter for your application; | |||
| K | 108015(Dia.23.2mm to 30.0mm Ring)/Adapter rings for 30mm eyepiece tube | ||
| L | 108016(Dia.23.2mm to 30.5mm Ring)/ Adapter rings for 30.5mm eyepiece tube | ||
| M | Calibration kit | 106011/TS-M1(X=0.01mm/100Div.); 106012/TS-M2(X,Y=0.01mm/100Div.); 106013/TS-M7(X=0.01mm/100Div., 0.10mm/100Div.) |
|
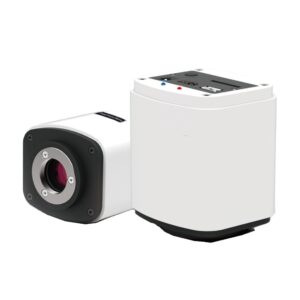
Camera Working Standalone with Built-in XCamView Software
Figure 7‑1 XCAMLITE4K Series Camera with the HDMI Displayer
For this application, apart from the microscope, the user only needs an XCAMLITE4K series camera, an HDMI display, an HDMI cable, an SD card, a USB mouse and a power adapter that come with the camera. The steps to start the camera are listed as below:
- Connect the camera to a HDMI display using the HDMI cable;
- Insert the supplied USB mouse to the camera’s USB port;
- Insert the supplied SD card into the XCAMLITE4Kseries camera SD card slot;
- Connect power adapter to the camera the and switch it on.;
- Switch on the display and view the video in the XCamView Move the mouse to the left, top or bottom of the XCamView UI, different control panel or UI will pop up and users could operate with the mouse at ease.
Connecting camera to the PC with USB port
For Windows user (Windows XP (32bit), Windows 7/8/10 (32/64 bit) ), please use ToupView.
For macOS and Linux user (macOS 10.10 or above or Linux distributions with kernel 2.6.27 or higher), please use ToupLite.
The steps to start the camera are listed below:
- Install the ToupView/ToupLite on your PC;
- Connect power adapter to the camera the and switch it on. After starting the camera, plug one end of the USB cable into the USB 2.0 port of the XCAMLITE4K series camera, and plug the other end into the USB port of the PC;
- Open ToupView/ToupLite The XCAMLITE4K series camera will be recognized automatically by software. In ToupView/ToupLite software, select the corresponding XCAMLITE4K series camera by clicking the camera name in the camera list.
Note:
When the USB cable and the mouse are plugged into the camera at the same time, the USB cable is preferred and the mouse is not available; when the USB cable is unplugged, the mouse can be used normally.